Once upon a time I used to love blogging.
Currently I don't feel that way. Thankfully my awesome friend Jenn reminded me that it's okay that I'm depressing and down. I'm allowed to be. We just had our 2 year angelversary of our beloved Spawn and we're 3 months past our loss of Offspring. I'm allowed to be bitter and cynical so thank you Jenn for reminding me!
Updates....
We have an appointment with a RE on the 27th. I know, I know, we said we weren't going to see one, but an opportunity presented itself and we have to take it. It got to the point that neither Doc nor Dr. Awesome would even prescribe progesterone for me. They just kept saying "go to the RE, go to the RE" so my mom worked her magic (I swear that woman is like the Blue Fairy from Pinocchio at times) and we have our appointment next week.
We're finally doing flooring in the house. About time right? We're starting with the downstairs floor first and then will move upstairs. We've picked out the tile and the guy is coming early next week to measure so we can order the tile. Hopefully that will get started in the next week or two. It'll be lovely to finally have new flooring.
Of course the new flooring means we'll be doing some other DIY projects that we've been putting off. Hopefully I'll get out of this funk and blog about those. We could use some happy posts right?
On the adoption front, the meeting got cancelled. We're going to schedule another one after we meet with the RE. We want to make sure we are making the right decisions for us.
Showing posts with label Home. Show all posts
Showing posts with label Home. Show all posts
Friday, March 22, 2013

Sunday, April 22, 2012
DIY: Side Tables
This weekend the 'rents and I headed to the beloved Ikea. As always,
that place rocked my world. I found a bajillion things I would LOVE to
put into my house, but somehow I managed to stick to my T approved
shopping list. The big task I wanted to complete this weekend was my
hacked Ikea Lack side tables. I'm sure you've seen this hack quite a few
times, I'm not going to pretend I'm the one who came up with it, but I
did add my own little touch...


 And cue "awe son of a..." it was too short, by like three inches. Yes, I'm sure I could have avoided this frustration had I actually measured everything before I went to Ikea, but that would make sense and I'm not all about that. I'm all about just buying something and then trying to find a way to Polish rig the SOB into working. So I sat down on my couch and pondered "how can I get this to be taller without taking away from the boxy look?
 :Ding: I figured it out. I was super excited when I figured out the way to give my table a little bit of a lift without taking away from the cube look. I was very excited to say the least. (I can neither confirm nor deny I was doing the "Carlton" when I figured out how to fix my raising issue.)
 Next on our agenda was to put the tables together more securely (read: fight with T over gluing the legs onto the "bases" and trying to get everything to line up when you are dealing with a cheaper brand table where nothing is lining up correctly.) There was four letter words flying, I might have told T I wanted to punch him in the face followed by him laughing hysterically at me as I vigorously washed my hands to get the glue off only for him to remind me the glue was water activated. Thanks hun, that information would have been more useful to me PRIOR to washing my hands!
 We let the glue set for the required amount of time and once my timer "dinged" I set out to set the tables in their respective areas. I will admit, I was ridiculously excited as T was moving the old tables and replacing with the new tables. Adding the white tables completely changed the look of the room making it more "mod" than it was before. We both love the straight, simple lines and the brightness of the white as opposed to the dark wood we had before. However, once we put the tables into place and added our new Ikea lights, a little vintage art and vase I realized how much I LOATHE my wood blinds and want to light them on fire. I think the next DIY task will be replacing them!
 So the big question is how did we raise them up without affecting the box look? It's so simple....
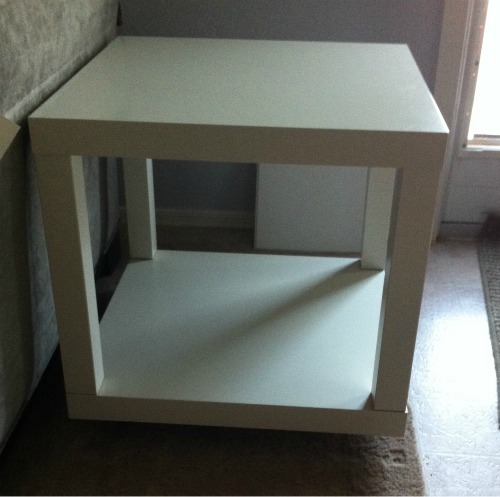
Yep, we just glued 2 of the extra legs to the bottom of the "base." We made sure to put them close enough to the center to keep them from being seen, giving the table almost a floating effect, but also close enough to the outside to keep the table stable.
I was actually really surprised that I hadn't seen this done yet. I've seen people basically stack the tables on top of one another and just cut the bottom tables legs to 2-3 inches, but to me that completely takes away from the box look we were going for.
Now that the tables are in their spots and I've had a couple hours to stare at them I can honestly say I LOVE them! They are exactly what we wanted and the total cost completely rocked our world without breaking our budget. This project has definitely thrown some fuel on our DIY fire.
Total Cost: $32.00 for 2 side tables!


Figured those first few steps would be a lot easier to just put into some simple collages. Yes, I'm one of those freaks who likes to take pictures of every step. I guess it's because I'm a visual learner. Anywho, after I got table 1 put together, it was time to see how tall my table would be once I added the "base" which is really just the table top from the 2nd table.
 And cue "awe son of a..." it was too short, by like three inches. Yes, I'm sure I could have avoided this frustration had I actually measured everything before I went to Ikea, but that would make sense and I'm not all about that. I'm all about just buying something and then trying to find a way to Polish rig the SOB into working. So I sat down on my couch and pondered "how can I get this to be taller without taking away from the boxy look?
 :Ding: I figured it out. I was super excited when I figured out the way to give my table a little bit of a lift without taking away from the cube look. I was very excited to say the least. (I can neither confirm nor deny I was doing the "Carlton" when I figured out how to fix my raising issue.)
  Next on our agenda was to put the tables together more securely (read: fight with T over gluing the legs onto the "bases" and trying to get everything to line up when you are dealing with a cheaper brand table where nothing is lining up correctly.) There was four letter words flying, I might have told T I wanted to punch him in the face followed by him laughing hysterically at me as I vigorously washed my hands to get the glue off only for him to remind me the glue was water activated. Thanks hun, that information would have been more useful to me PRIOR to washing my hands!
  We let the glue set for the required amount of time and once my timer "dinged" I set out to set the tables in their respective areas. I will admit, I was ridiculously excited as T was moving the old tables and replacing with the new tables. Adding the white tables completely changed the look of the room making it more "mod" than it was before. We both love the straight, simple lines and the brightness of the white as opposed to the dark wood we had before. However, once we put the tables into place and added our new Ikea lights, a little vintage art and vase I realized how much I LOATHE my wood blinds and want to light them on fire. I think the next DIY task will be replacing them!
 So the big question is how did we raise them up without affecting the box look? It's so simple....
 Yep, we just glued 2 of the extra legs to the bottom of the "base." We made sure to put them close enough to the center to keep them from being seen, giving the table almost a floating effect, but also close enough to the outside to keep the table stable.
I was actually really surprised that I hadn't seen this done yet. I've seen people basically stack the tables on top of one another and just cut the bottom tables legs to 2-3 inches, but to me that completely takes away from the box look we were going for.
Now that the tables are in their spots and I've had a couple hours to stare at them I can honestly say I LOVE them! They are exactly what we wanted and the total cost completely rocked our world without breaking our budget. This project has definitely thrown some fuel on our DIY fire.
Total Cost: $32.00 for 2 side tables!
Wednesday, January 11, 2012
Going Green: Stove Top
No, not the super awesome boxed side dish. I'm talking about your actual glass stove top. I don't know about you, but mine gets wicked dirty and feels like it's such a pain in the rear to clean. It's also the type where you HAVE to clean up the messes before you use it again. Otherwise it cakes on and becomes even more impossible to clean. All in all, I'm not a fan, but I'll keep it.
So that brings me to how to actually clean this thing sans harsh chemicals. It's super easy and if you do it right it's actually a lot faster than using the store bought cleaners. I also noticed messes don't stick to it as easy.
So our starting line up:
Baking Soda
Bucket/bowl of warm soapy water
Soft Washcloths/Towels*
Gloves
*note: be careful on your towel choice, you don't want anything too abrasive that will scratch your glass stove top.


Step One: Grab your warm soapy water (don't use too much soap)
Step Two: Throw your towels into said soapy water, let soak a few
 Step Three: Sprinkle baking soda all over your stove top. I use a larger amount in really dirty/greasy areas
 Step Four: Squeeze the excess water out of your towels and place the damp towels gently over your stove top
 Step Five: Set an alarm and walk away for 15 minutes. It HAS to sit for at least 15 minutes.
 Step Six: Grab your gloves. Trust me, don't try to do this without them. The first time I didn't have gloves and thought "eh, why do I need them," but by the end of my cleaning my hands burned they were so dry. Baking soda dries your hands out something fierce something fast. So PLEASE save yourself the agony and just wear the damn gloves!
 Step Seven: Gently start to wipe the baking soda off. Now some areas will need a little more elbow grease or even some more baking soda. No worries, just adapt and adjust as needed. Essentially you want to liquify the baking soda, rub it all over and rub as much excess as possible off. Just keep repeating these steps until you have your stove cleaned to your standards. The first time or two it may take a couple shots.
 Step Eight: Do your best to not cuss me out when you notice this ugly film form on your stove top. It comes off, I promise. Absolutely no one warned me about this in all the tutorials I found on this process and I was PISSED when it happened. I thought I did something wrong or screwed something up and just ruined my stove top. Pissed actually doesn't come close to it. I was like track down and whoop your ass pissed. Grab your windex and a soft microfiber towel and buff it out.
 Step Nine: Let out a loud sigh when you realize your stove top is not only not broken, but super clean! Now, this may seem like a lot of steps, but once you actually get it down it goes really fast (after the waiting time of course) and honestly I really do love how my stove looks. It also is easy to clean it if you maintain the clean.
Overall impression: This new process is not only CHEAP, it's really easy to do so it's another permanent staple in this house.
So that brings me to how to actually clean this thing sans harsh chemicals. It's super easy and if you do it right it's actually a lot faster than using the store bought cleaners. I also noticed messes don't stick to it as easy.
So our starting line up:
Baking Soda
Bucket/bowl of warm soapy water
Soft Washcloths/Towels*
Gloves
*note: be careful on your towel choice, you don't want anything too abrasive that will scratch your glass stove top.


Step One: Grab your warm soapy water (don't use too much soap)
Step Two: Throw your towels into said soapy water, let soak a few


Overall impression: This new process is not only CHEAP, it's really easy to do so it's another permanent staple in this house.
Sunday, January 8, 2012
Going Green: Laundry Detergent *New recipe
Next on the agenda is the laundry detergent, the revised recipe of course. As I previously stated there were times where I found my laundry needed just a little more oomph to get it clean. So off to the internet I went to find a recipe that includes Oxyclean. I've used oxyclean in other capacities so I know the stuff is good.
 The starting line up is:
1 Cup Borax
1 Cup Washing Soda
1/2 Cup Oxyclean product*
1 bar Fels-Naptha
*note: Don't feel like you have to buy the name brand Oxyclean. We didn't. T actually compared labels in the store (I wanted the name brand) and the generic version is literally identical in ingredients to the name brand, but like 1/3 the price. I'm not THAT interested in paying for a label if you know what I mean.
Mixing is much like the old recipe so I'll spare the pics. Mix the 1 cup borax, 1 cup washing soda & 1/2 cup oxyclean product. Grade your bar of fels-naptha and combine with the mixture. Some people then use a food processor to mix it all to a sand consistency and while I understand I was way too lazy last time and didn't. The effect is the same and honestly over time the fels-naptha starts to break down anyway so a week or two later it's pretty much the sand consistency. To use, add 1-2 tablespoons to your load (I use 2 on linens/towels/T's uniforms.)
 Much like the dishwasher detergent, you might have issues with the borax & washing soda clumping so be sure to store in an air tight container. I use two actually. Since I make bulk batches I have a large container and a small one that I transfer to. The small one is just easier to get into so I just pour into. Every time I use it I make sure to give the container a good shake to make sure everything stays mixed up nicely.
The laundry detergent, I've been using faithfully since I started this whole transition and I'm never going back. The amount of money we save is sickening. We do a lot of laundry in this house due to have animals and living in dusty Arizona. I will spend roughly $16 on all my supplies to make a batch that will last around 4 months when originally we paid $16 every 3 weeks or so for the CHEAP detergent.
Overall impression: The new recipe has proven to work better than the store bought stuff and I have less issues with my colors fading and my whites look awesome. Another permanent fixture in this house.

1 Cup Borax
1 Cup Washing Soda
1/2 Cup Oxyclean product*
1 bar Fels-Naptha
*note: Don't feel like you have to buy the name brand Oxyclean. We didn't. T actually compared labels in the store (I wanted the name brand) and the generic version is literally identical in ingredients to the name brand, but like 1/3 the price. I'm not THAT interested in paying for a label if you know what I mean.
Mixing is much like the old recipe so I'll spare the pics. Mix the 1 cup borax, 1 cup washing soda & 1/2 cup oxyclean product. Grade your bar of fels-naptha and combine with the mixture. Some people then use a food processor to mix it all to a sand consistency and while I understand I was way too lazy last time and didn't. The effect is the same and honestly over time the fels-naptha starts to break down anyway so a week or two later it's pretty much the sand consistency. To use, add 1-2 tablespoons to your load (I use 2 on linens/towels/T's uniforms.)

The laundry detergent, I've been using faithfully since I started this whole transition and I'm never going back. The amount of money we save is sickening. We do a lot of laundry in this house due to have animals and living in dusty Arizona. I will spend roughly $16 on all my supplies to make a batch that will last around 4 months when originally we paid $16 every 3 weeks or so for the CHEAP detergent.
Overall impression: The new recipe has proven to work better than the store bought stuff and I have less issues with my colors fading and my whites look awesome. Another permanent fixture in this house.
Friday, January 6, 2012
Going Green: Dishwasher Detergent
I'm going to start with one of my favs, the dishwasher detergent. Searching for a good recipe wasn't too hard and I was very excited to try it because we go through A LOT of dishes in this house. We have no disposable anything so if you need a glass of water, it's literally a glass. Same thing for plates and silverware. Oh lord do we go through the silverware, especially butter knives thanks to T's love of peanut butter & jelly sandwiches. Anyspoons, onto the goods. This recipe is super easy, super cheap and yields a LOT. I should warn that this recipe is specific to hard water. So if you have a water softener, you will need to do a further search for a soft water friendly detergent.
 We have our starting line up:
1 Box Borax
1 Box Washing Soda
3 Cups Epsom Salts
24 packets UNSWEETENED Lemonade mix*
Lemi-Shine Rinse aid
*note: some say that the lemonade mix will stain the inside of your dishwasher, especially the little cup area that you put it in, but I've been using it over 2 months now with zero issues. Personally, I'm not overly concerned about the staining as long as my dishes end up clean.
 Grab a big container because as I said, it yields A LOT! Mix the entire box of Borax with the entire box of Washing Soda. Add the 3 cups Epsom Salts, mix. Add the 24 packets of lemonade mix, mix. Make sure you really mix this stuff up good. You'll notice that it takes a on a yellow hue from the lemonade mix and when it comes into contact with water it will really show the yellow.
Transfer to an air tight container. If you do not put it in an air tight container the mixture will clump, be warned. I've run into the issue, but I just give it a good mix before using. To use at 1 tablespoon of the detergent mix into the prewash compartment & 1 tablespoon lemi-shine into the detergent compartment. If you don't have both, put the dishwasher detergent in the normal place and sprinkle the lemi-shine at the bottom of your dishwasher. I have been known to use 2 tablespoons of the detergent on our heavily soiled loads though. Food for thought.
 In this house, I keep a small container under the sink (with instructions for use in the event T EVER does dishes) and the remaining portion in a garbage bag that has all the air pushed out (well as much as possible.) So far I haven't had to tap into our extra stash and I have probably 3/4 of the original container still in there. You could probably cut the recipe down if you wanted to, but I'm too lazy to try to figure out the math and I prefer to do as much in bulk as possible. Saves me time later.
I've been using this mix now for well over 2 months and I have to say my dishes have never looked better. We have super hard water in my area and I have navy blue dishes. I got to the point that I never used the dishwasher due to all the spots on our dishes. It grossed me out to be honest. So everything was hand washed, but when I found this recipe the lady swore by it and she was right. Occasionally we will have some dishes that need to be rewashed, but that's more due to my lazy rinsing before loading.
The grand total for my lord knows how many months worth of dishwasher detergent: $18.40.
Borax: $5.00
Washing Soda: $4.00
Epsom Salts: $2.00
Lemonade Mix: $2.40
Lemi-Shine Rise Aid: $5.00
Overall impression: Very effective detergent and a permanent fixture in this house!

1 Box Borax
1 Box Washing Soda
3 Cups Epsom Salts
24 packets UNSWEETENED Lemonade mix*
Lemi-Shine Rinse aid
*note: some say that the lemonade mix will stain the inside of your dishwasher, especially the little cup area that you put it in, but I've been using it over 2 months now with zero issues. Personally, I'm not overly concerned about the staining as long as my dishes end up clean.

Transfer to an air tight container. If you do not put it in an air tight container the mixture will clump, be warned. I've run into the issue, but I just give it a good mix before using. To use at 1 tablespoon of the detergent mix into the prewash compartment & 1 tablespoon lemi-shine into the detergent compartment. If you don't have both, put the dishwasher detergent in the normal place and sprinkle the lemi-shine at the bottom of your dishwasher. I have been known to use 2 tablespoons of the detergent on our heavily soiled loads though. Food for thought.

I've been using this mix now for well over 2 months and I have to say my dishes have never looked better. We have super hard water in my area and I have navy blue dishes. I got to the point that I never used the dishwasher due to all the spots on our dishes. It grossed me out to be honest. So everything was hand washed, but when I found this recipe the lady swore by it and she was right. Occasionally we will have some dishes that need to be rewashed, but that's more due to my lazy rinsing before loading.
The grand total for my lord knows how many months worth of dishwasher detergent: $18.40.
Borax: $5.00
Washing Soda: $4.00
Epsom Salts: $2.00
Lemonade Mix: $2.40
Lemi-Shine Rise Aid: $5.00
Overall impression: Very effective detergent and a permanent fixture in this house!
Wednesday, January 4, 2012
Going Green: An Update
So it was brought to my attention that I suck at following up on stuff (she was much nicer in her delivery.) I guess I didn't realize that I sort of fell of the face of the Earth with the updates about our going green with cleaning. I can say that it's going very well and I am SOLD on it. Never going back. EVER.
Lets start with the basics, the recipes:
General Surface Cleaner (also has wood furniture polish recipe)
Granite Cleaner
Dishwasher Detergent
NEW Laundry Detergent (I needed a little extra oomph)
Glass Stove Top Cleaner
Glass/Mirror Cleaner
Baking soda has pretty much replaced my use of Comet or any other type of abrasive cleaner. It actually works a lot better too, but be advised it will dry your hands out something fierce so be sure to wear gloves. Baking soda is also how I deodorize my carpet. I just sprinkle some all over my floor, let it sit for a few and then vacuum right up. Awesome.
Aside from the perk that I'm not bringing more harsh chemicals into this house, we are indeed saving a lot of money! I just made a HUGE batch of laundry detergent that will last us at least 4 months for about $20. Not too shabby to me. I also buy the vinegar and baking soda when it's on sale & I stock up to save even more money. Just trust me, it's worth at least trying.
Over the next couple of days (or weeks) I will be blogging about the specifics of the cleaning including some step by step instructions complete with pictures so stay tuned!!
Lets start with the basics, the recipes:
General Surface Cleaner (also has wood furniture polish recipe)
Granite Cleaner
Dishwasher Detergent
NEW Laundry Detergent (I needed a little extra oomph)
Glass Stove Top Cleaner
Glass/Mirror Cleaner
Baking soda has pretty much replaced my use of Comet or any other type of abrasive cleaner. It actually works a lot better too, but be advised it will dry your hands out something fierce so be sure to wear gloves. Baking soda is also how I deodorize my carpet. I just sprinkle some all over my floor, let it sit for a few and then vacuum right up. Awesome.
Aside from the perk that I'm not bringing more harsh chemicals into this house, we are indeed saving a lot of money! I just made a HUGE batch of laundry detergent that will last us at least 4 months for about $20. Not too shabby to me. I also buy the vinegar and baking soda when it's on sale & I stock up to save even more money. Just trust me, it's worth at least trying.
Over the next couple of days (or weeks) I will be blogging about the specifics of the cleaning including some step by step instructions complete with pictures so stay tuned!!
Saturday, December 31, 2011
Goodbye 2011
I don't know about all of you, but I'm so over 2011. While we did have a couple good things happen this year (T's promotion & my nephew), our year was mostly drama and bad news. So, I'm over it. I'm going into 2012 with high hopes about our future and with a positive attitude. I figured if I start the year on a good note, it will help make it a good year right?
In typical New Years fashion, I've come up with some resolutions. They aren't crazy or over the top. They are simple, but hey, I'm a simple girl with simple needs.
1. Lose at least 30 more pounds. I'm proud of my weight loss up to now, but I'm not quite where I want to be yet. I'm close, but not there so back to hardcore dieting and working out for me.
2. Write more. Not on my blog, although it is a nice release for me. I'm talking about writing as in books. I LOVE to write and I've always wanted to be a writer. I just lacked the courage to actually go after it.
3. Get pregnant. Pretty self explanatory there.
4. Stay pregnant & deliver a healthy baby. Getting pregnant is only the first step, the real challenge is getting past the first trimester and then carrying the baby to term.
5. Pay off more debt. I don't have an actual total I'd like to hit, just focus more on getting it taken care of.
6. Do more projects around the house. I would LOVE to complete our bigger projects this year of moving the wall in our powder room downstairs and actually enclosing the theatre. After that it's flooring. Oh god do we need new flooring.
7. Be more optimistic. I would really like to ditch my negative nelly attitude and try to focus on the good and good things to come.
8. Either find or build a tv stand. We have a behemoth of a tv downstairs and the stand it currently rests on is just too small. We need a new stand because it's driving me batty. I want it to be white.
9. Learn to sew. My mom is a pretty good sewer and I would like to learn how to do it. I would really like to be able to hem my own pants and do any of the tasks that are currently pinned to my "Sewing" board.
10. DIY more. My capiz chandelier was a good start (although I AM going to redo it), but I would like to actually go a little deeper in DIYing. You can save a lot of money and I think there is a lot of satisfaction when you create something.
So there you have it. My 2012 resolutions. I told you they weren't over the top and they probably aren't even that impressive, but these are things that are really important to me. So, here's to good things in 2012!
In typical New Years fashion, I've come up with some resolutions. They aren't crazy or over the top. They are simple, but hey, I'm a simple girl with simple needs.
1. Lose at least 30 more pounds. I'm proud of my weight loss up to now, but I'm not quite where I want to be yet. I'm close, but not there so back to hardcore dieting and working out for me.
2. Write more. Not on my blog, although it is a nice release for me. I'm talking about writing as in books. I LOVE to write and I've always wanted to be a writer. I just lacked the courage to actually go after it.
3. Get pregnant. Pretty self explanatory there.
4. Stay pregnant & deliver a healthy baby. Getting pregnant is only the first step, the real challenge is getting past the first trimester and then carrying the baby to term.
5. Pay off more debt. I don't have an actual total I'd like to hit, just focus more on getting it taken care of.
6. Do more projects around the house. I would LOVE to complete our bigger projects this year of moving the wall in our powder room downstairs and actually enclosing the theatre. After that it's flooring. Oh god do we need new flooring.
7. Be more optimistic. I would really like to ditch my negative nelly attitude and try to focus on the good and good things to come.
8. Either find or build a tv stand. We have a behemoth of a tv downstairs and the stand it currently rests on is just too small. We need a new stand because it's driving me batty. I want it to be white.
9. Learn to sew. My mom is a pretty good sewer and I would like to learn how to do it. I would really like to be able to hem my own pants and do any of the tasks that are currently pinned to my "Sewing" board.
10. DIY more. My capiz chandelier was a good start (although I AM going to redo it), but I would like to actually go a little deeper in DIYing. You can save a lot of money and I think there is a lot of satisfaction when you create something.
So there you have it. My 2012 resolutions. I told you they weren't over the top and they probably aren't even that impressive, but these are things that are really important to me. So, here's to good things in 2012!
Sunday, October 16, 2011
DIY Capiz Chandlier: It's Done!

 Now that it's done, allow me to pass a good tip on how to make this project go faster and smoother. Since I hot glued my shells to the fishing wire, it took FOREVER to attach each shell. Thankfully on Friday night I found a new way of attaching them and I so wish I would have found it earlier. It made the process go super fast. I would tape the fishing wire to my counter and slide the "shells" underneath it. I would move them around and play with the layout until I found the layout I wanted. I would do 5 strands at a time. Then I would go with my hot glue gun and dab little beads of glue on each shell and move on. In the time it would take me to do one strand normally, I was able to kick out 5. By the time I put the last drop of glue on the final shell, the first strand was usually dry so I could pull them up and start over. I was able to finish about 40 strands of shells while I watched The Wizard of Oz on my iPad!
 After I finished it all, I did the math to figure out how many shells were made. I ended up cutting and attaching 1,197 shells. I about fell over when I found that out. I knew that it was a lot of them, but when I actually did the math and found out exactly how many it was I was really surprised. This project ultimately cost me about $25 which isn't too bad and I have many intentions of leaving it up for many years to come. I figured any project that I invest that many hours into is going to stay up for
 |
| Original light. |
 |
| New Light -- Off |
 |
| New Light -- On |

Sunday, October 9, 2011
Testing, Family & Cleaning...
Testing...
2nd progesterone draw was on Friday. Once again the phlebotomist ignored the directions that she told me to give to her (butterfly in the right arm) and used the regular needle and went into my left. I'm used to her ignoring me at this point since I've had a dozen blood draws from her. As every other time, she lost my vein and had to fish. On Friday my arm was looking pretty banged up, but it doesn't look so bad today. I'm anxious for these results because in theory my doc will make a decision once they are back. I'm just hoping we can get back to TTCAL soon! If all goes well, we could possibly have an August baby which would be hilarious because that would be a 3rd generation August birthday in my immediate family alone (my dad is 1 week before me.) My family has a butt ton of August birthdays, so one more would be cool.
Family...
My sister had my nephew Thursday and I am happy to report he is doing well, as is she. He was smaller then predicted at 8 lbs, 12 oz & 19.5 inches long. Sure he's a big boy, but they were guesstimating him at over 9 pounds! My mom has been texting me a butt ton of pics and he's ADORABLE! I won't be posting any pics since it's rude to post pics of someone else's kid without asking them and I don't want my family to know about this blog just yet. Maybe someday, but not today. For now, it's for me. They were released today and are now at home adjusting. My mom thinks he's going to be a screamer like my sister, but hopefully he'll mellow out. If kids act like you though when you were a kid, I'm stoked because I was an AWESOME baby! I slept...a lot. Not much has changed actually...
Cleaning...
I finally got around to doing my big green cleaning session and I'm here to tell you, I'm NEVER going back. I will admit, shamefully, that I did use windex. Only because I forgot to bookmark the recipe I found and didn't feel like searching for it when I was already cleaning. I did use the general surface cleaner and the floor cleaner and OMG love them! I also used a recipe I found for toilet bowl cleaner. It's baking soda, olive oil & a few drops of essential oil. Worked wonderfully and it makes me feel so much better knowing if my dogs were to sneak a drink they'd be okay. Normally we keep all the lids closed, but sometimes you forget if you are in a hurry or it's the middle of the night.
The surface cleaner was awesome and so simple to make. I will admit it did make everything smell like vinegar when I was wiping them, but once they dried, you couldn't smell the vinegar at all. Even T said he couldn't smell it. I would just spray it on the counter or sink and wipe with a cloth. I also followed it up with a soft dry cloth to prevent the solution from staying on the surface too long. Not that it's horrible and going to eat at your stuff, but vinegar is pretty acidic and considering the essential oil I used was lemon, that's quite a bit going on. So I played it a bit safe.
I also used vinegar in my mopping session and I'm telling you, I'm throwing every other stupid mop OUT! I'll keep my steam mop for those quick "oh shit" moments, but the Clorox and Swiffer wet jet are not allowed in this home. My new mop worked wonderfully and my floors are literally squeaky clean. The floor cleaner is simply hot water, vinegar, baking soda & a few drops of essential oil (lemon again since it's the only one I'll use.) Bit of advice, when you are making the cleaning solution, fill your bucket maybe 1/4 of the way with the hot water, add the baking soda and the vinegar and the essential oils. I'm only saying this because baking soda and vinegar don't play well together so they do that awesome volcano explosion action. Cool to look at, but had I not left my water level low, it would have been messy. After the fizzy dies down fill the rest of the bucket up to about 3/4 full.
I know a lot of people are anti old school mopping, but I'm here to tell you if you do it right it's a million times better than the stupid "quick" mops. Trust me. I'm mad OCD about germs (like actually diagnosed by a medical professional who spent many years studying psychology.) I know a lot of the arguments are you are just using dirty water or takes your floors too long to dry and if those are your arguments, you are mopping wrong. It's easy to do it wrong honestly. My mopping sessions are a crap ton faster with an actual mop & bucket then they are with the Clorox/Swiffer mops. I follow the same patter every time, sweep the floor, do the baseboards then the floor. I always change the water between rooms and even multiple times when mopping large areas like the kitchen. I know some hate pouring the water in their bathtub or sink, but both are always the last to get cleaned in this house so it's no big deal to me. Not to mention, it's water, vinegar, baking soda and some oils, not exactly harsh on the drain.
If you find your floors take too long to dry, then you are using too much water. The goal is to get a good mop that you can squeeze the water out of. Your actual mop head should be damp, not soaking wet. I squeeze mine out a few times so when I have to put elbow grease into it the water doesn't come flowing from the mop. My floors dry really fast and by the time I'm done mopping the next room, the first one is completely dry. I also wear socks when I mop. When your floor is damp the dirt from your feet is going to stick to it like a SOB. It also prevents slipping if you are wearing the right socks. For me, I wear white so I can do the white sock test to see if I missed a spot. Another thing, the mop I got isn't a square mop so I was able to get it into those hard to reach spots behind the toilets with no problems. Using the other crappy ones, or even a square mop I had to rock the old school hands and knees. So I wasn't feeling as sore after this session.
I was successfully able to deep clean the kitchen, all three bathrooms and the foyer in about 45 min from start to finish. Not too shabby, then again I have cleaning down to a science from doing it so much. Next on my agenda is to come up with a good carpet solution for those dirty spots (thank you doggies!) and help with the smells. Eventually all carpet will be removed from my house with the exception of the theater (for sound control), but for now I have to deal with it. Let me tell you, when you have OCD about germs, carpet is the WORST thing to have because it's never really "clean." No matter how good your vacuum is, dirt gets caught in the fibers. I also found a few good tips to help with the air quality in your home, so some plants will be moving in.
All in all I'm really pleased with the transition into green cleaning and now that I've seen the results, I'm really confident this is going to be a permanent change.
2nd progesterone draw was on Friday. Once again the phlebotomist ignored the directions that she told me to give to her (butterfly in the right arm) and used the regular needle and went into my left. I'm used to her ignoring me at this point since I've had a dozen blood draws from her. As every other time, she lost my vein and had to fish. On Friday my arm was looking pretty banged up, but it doesn't look so bad today. I'm anxious for these results because in theory my doc will make a decision once they are back. I'm just hoping we can get back to TTCAL soon! If all goes well, we could possibly have an August baby which would be hilarious because that would be a 3rd generation August birthday in my immediate family alone (my dad is 1 week before me.) My family has a butt ton of August birthdays, so one more would be cool.
Family...
My sister had my nephew Thursday and I am happy to report he is doing well, as is she. He was smaller then predicted at 8 lbs, 12 oz & 19.5 inches long. Sure he's a big boy, but they were guesstimating him at over 9 pounds! My mom has been texting me a butt ton of pics and he's ADORABLE! I won't be posting any pics since it's rude to post pics of someone else's kid without asking them and I don't want my family to know about this blog just yet. Maybe someday, but not today. For now, it's for me. They were released today and are now at home adjusting. My mom thinks he's going to be a screamer like my sister, but hopefully he'll mellow out. If kids act like you though when you were a kid, I'm stoked because I was an AWESOME baby! I slept...a lot. Not much has changed actually...
Cleaning...
I finally got around to doing my big green cleaning session and I'm here to tell you, I'm NEVER going back. I will admit, shamefully, that I did use windex. Only because I forgot to bookmark the recipe I found and didn't feel like searching for it when I was already cleaning. I did use the general surface cleaner and the floor cleaner and OMG love them! I also used a recipe I found for toilet bowl cleaner. It's baking soda, olive oil & a few drops of essential oil. Worked wonderfully and it makes me feel so much better knowing if my dogs were to sneak a drink they'd be okay. Normally we keep all the lids closed, but sometimes you forget if you are in a hurry or it's the middle of the night.
The surface cleaner was awesome and so simple to make. I will admit it did make everything smell like vinegar when I was wiping them, but once they dried, you couldn't smell the vinegar at all. Even T said he couldn't smell it. I would just spray it on the counter or sink and wipe with a cloth. I also followed it up with a soft dry cloth to prevent the solution from staying on the surface too long. Not that it's horrible and going to eat at your stuff, but vinegar is pretty acidic and considering the essential oil I used was lemon, that's quite a bit going on. So I played it a bit safe.
I also used vinegar in my mopping session and I'm telling you, I'm throwing every other stupid mop OUT! I'll keep my steam mop for those quick "oh shit" moments, but the Clorox and Swiffer wet jet are not allowed in this home. My new mop worked wonderfully and my floors are literally squeaky clean. The floor cleaner is simply hot water, vinegar, baking soda & a few drops of essential oil (lemon again since it's the only one I'll use.) Bit of advice, when you are making the cleaning solution, fill your bucket maybe 1/4 of the way with the hot water, add the baking soda and the vinegar and the essential oils. I'm only saying this because baking soda and vinegar don't play well together so they do that awesome volcano explosion action. Cool to look at, but had I not left my water level low, it would have been messy. After the fizzy dies down fill the rest of the bucket up to about 3/4 full.
I know a lot of people are anti old school mopping, but I'm here to tell you if you do it right it's a million times better than the stupid "quick" mops. Trust me. I'm mad OCD about germs (like actually diagnosed by a medical professional who spent many years studying psychology.) I know a lot of the arguments are you are just using dirty water or takes your floors too long to dry and if those are your arguments, you are mopping wrong. It's easy to do it wrong honestly. My mopping sessions are a crap ton faster with an actual mop & bucket then they are with the Clorox/Swiffer mops. I follow the same patter every time, sweep the floor, do the baseboards then the floor. I always change the water between rooms and even multiple times when mopping large areas like the kitchen. I know some hate pouring the water in their bathtub or sink, but both are always the last to get cleaned in this house so it's no big deal to me. Not to mention, it's water, vinegar, baking soda and some oils, not exactly harsh on the drain.
If you find your floors take too long to dry, then you are using too much water. The goal is to get a good mop that you can squeeze the water out of. Your actual mop head should be damp, not soaking wet. I squeeze mine out a few times so when I have to put elbow grease into it the water doesn't come flowing from the mop. My floors dry really fast and by the time I'm done mopping the next room, the first one is completely dry. I also wear socks when I mop. When your floor is damp the dirt from your feet is going to stick to it like a SOB. It also prevents slipping if you are wearing the right socks. For me, I wear white so I can do the white sock test to see if I missed a spot. Another thing, the mop I got isn't a square mop so I was able to get it into those hard to reach spots behind the toilets with no problems. Using the other crappy ones, or even a square mop I had to rock the old school hands and knees. So I wasn't feeling as sore after this session.
I was successfully able to deep clean the kitchen, all three bathrooms and the foyer in about 45 min from start to finish. Not too shabby, then again I have cleaning down to a science from doing it so much. Next on my agenda is to come up with a good carpet solution for those dirty spots (thank you doggies!) and help with the smells. Eventually all carpet will be removed from my house with the exception of the theater (for sound control), but for now I have to deal with it. Let me tell you, when you have OCD about germs, carpet is the WORST thing to have because it's never really "clean." No matter how good your vacuum is, dirt gets caught in the fibers. I also found a few good tips to help with the air quality in your home, so some plants will be moving in.
All in all I'm really pleased with the transition into green cleaning and now that I've seen the results, I'm really confident this is going to be a permanent change.
Monday, October 3, 2011
Lots
I'm lazy so I'm covering a lot of topics in one post.
DIY Projects:
 1. Dry Erase Board. While perusing my new love Pinterest, I came across this wicked cute idea. I had most of the supplies on hand so all I needed to get was some fabric and some dry erase markers. I ended up spending less than $5 to accomplish this thanks to the awesome fabric find that my mom found at Joann's during our way too long fabric hunt. I'm pleased with the final product despite the lovely burn I have on my right arm from the iron. Apparently my iron heats up FAST! I was in the laundry room doing laundry and wasn't paying attention since I had just turned on my iron, yeah it was HOT.
2. Mirror. I mentioned in a prior post that I bought a new mirror at Ikea that I had been lusting after. I hated the black color so my original idea was white. T painted it and I ended up hating it. So we painted it a pretty bold, but gorgeous color. I am waiting to post it until I have it up on the wall because without it being in place you won't appreciate it's full awesome factor.
3. Capiz Chandelier. Still chugging along with it. It's taking a hella long time and is so frustrating and the worst part is I'm not falling in love with it. The more I work on it, the more aggravated I get with it causing me to despise it. After I finish it (this month!) we will hang it in the laundry room until I make my decision if I like it. If I don't, it will stay in the laundry room and I'll do something else for the dining room. I want to love it, so we'll see.
 4. Curtains. I have recruited my mom to help me with new curtains for our sliding glass door. When we painted, actually when my dad and T painted and I watched, our much hated vertical blinds bit it so we had to do a quick solution. The curtains I had hanging above my windows became our sliding glass door curtains. They aren't long enough, they don't match and I hate them. Thanks to Pinterest (T is really beginning to hate that website) I found the PERFECT curtains. You'll have to wait and see!
Going Green Update
So I slept on the linens and are happy to report NO reaction. In fact, they were SO soft. Much like my clothes, they didn't have much of a smell, so that wasn't a problem either. T has officially given me the okay to wash his uniforms in it as well! That'll be this weekend, so wish me luck.
Baby Front
We're as close today as we were on March 20th to being parents. I had to call this afternoon to verify my blood draw for Friday, which I'm not at all looking forward to. The phlebotomist sucks, there are usually tons of pregnant women there and for some reason I always feel like I have to rehash my entire history with the staff. Why they can't just read my chart is beyond me. Hopefully we'll have a game plan soon that won't involve anymore testing because that would just royally piss me off. We are now over 6 months post m/c and still don't have the green light. I'm over it really! I'm trying to stay positive and distracted and it works, sometimes, but the closer I get to my original due date, the harder it is to stay distracted. I really hate that I thought I would be pregnant again by November 1st. Who knows if we'll even have a plan by then.
DIY Projects:

2. Mirror. I mentioned in a prior post that I bought a new mirror at Ikea that I had been lusting after. I hated the black color so my original idea was white. T painted it and I ended up hating it. So we painted it a pretty bold, but gorgeous color. I am waiting to post it until I have it up on the wall because without it being in place you won't appreciate it's full awesome factor.
 |
| Mirror Before |
 | |
| First After |
3. Capiz Chandelier. Still chugging along with it. It's taking a hella long time and is so frustrating and the worst part is I'm not falling in love with it. The more I work on it, the more aggravated I get with it causing me to despise it. After I finish it (this month!) we will hang it in the laundry room until I make my decision if I like it. If I don't, it will stay in the laundry room and I'll do something else for the dining room. I want to love it, so we'll see.

Going Green Update
So I slept on the linens and are happy to report NO reaction. In fact, they were SO soft. Much like my clothes, they didn't have much of a smell, so that wasn't a problem either. T has officially given me the okay to wash his uniforms in it as well! That'll be this weekend, so wish me luck.
Baby Front
We're as close today as we were on March 20th to being parents. I had to call this afternoon to verify my blood draw for Friday, which I'm not at all looking forward to. The phlebotomist sucks, there are usually tons of pregnant women there and for some reason I always feel like I have to rehash my entire history with the staff. Why they can't just read my chart is beyond me. Hopefully we'll have a game plan soon that won't involve anymore testing because that would just royally piss me off. We are now over 6 months post m/c and still don't have the green light. I'm over it really! I'm trying to stay positive and distracted and it works, sometimes, but the closer I get to my original due date, the harder it is to stay distracted. I really hate that I thought I would be pregnant again by November 1st. Who knows if we'll even have a plan by then.
Sunday, October 2, 2011
Going Green: The Dirt on Laundry
Unfortunately, I did not acccomplish my goal of a big green cleaning session on Saturday night. Due to my own poor time management (aka, stayed up too late Friday night playing The Sims 3) I was dead tired by Saturday evening so it didn't go down. I did however, do my laundry! I went into the laundry with high hopes that it would be a success and it was!
First up was our bed linens. I had to wash the sheets, the quilt and our uber soft white blanket. For these I did do 2 scoops because normally I have to use the large portion of detergent and I wasn't sure what I was going to have to do with the DIY stuff. Everything came out smelling fresh, not scented, but fresh. It all passed the soft test, nothing felt scratchy and our white blanket ended up coming out REALLY bright. That was a big and pleasant surprise. Since we've had it for like 3 years now, it has become a really dull cream color. When I pulled it out of the dryer, it was fluffy, soft and really bright. I'll have to report back with how they do on the sleep test since I obviously haven't slept on them yet.
I didn't do T's uniforms in it only because I wasn't sure how it would turn out and there was NO way I was going to risk $500 in uniforms being jacked up so they got the old stuff. Everything else got the new detergent, 1 scoop each load, and so far everything seems fine. My clothes feel soft, the whites are SUPER bright. Most of my colors seem okay, but since they are all pretty faded they didn't come out nearly as bright as my whites. I'm actually wearing some of the stuff washed in the new detergent and I don't notice much of a difference which I consider to be a success. I have super sensitive skin and I'm not having an itchy feelings or such.
Eventually I would like to try switching T's uniforms to the new stuff, but I'm going to give the DIY goods a few more shots before I make the change. The only thing that is a bit of a change is the lack of smell. Normally my clothes smell like whatever detergent or dryer sheets I'm using. After being out of the dryer for a couple hours, my clothes don't smell like anything. That's a bummer just cause I got so used to that Mountain Fresh type smell, but I'm sure I'll be happier with this.
On the other DIY front, I have A LOT going on and A LOT planned. To try to keep my expenses at bay, I'm going to do a list of what tasks I want to accomplish each month and my budget for them. If I am planning something big, obviously the other small ones will have to wait, but I'll report on that later. For now, it's off to bed to test out the linens.
First up was our bed linens. I had to wash the sheets, the quilt and our uber soft white blanket. For these I did do 2 scoops because normally I have to use the large portion of detergent and I wasn't sure what I was going to have to do with the DIY stuff. Everything came out smelling fresh, not scented, but fresh. It all passed the soft test, nothing felt scratchy and our white blanket ended up coming out REALLY bright. That was a big and pleasant surprise. Since we've had it for like 3 years now, it has become a really dull cream color. When I pulled it out of the dryer, it was fluffy, soft and really bright. I'll have to report back with how they do on the sleep test since I obviously haven't slept on them yet.
I didn't do T's uniforms in it only because I wasn't sure how it would turn out and there was NO way I was going to risk $500 in uniforms being jacked up so they got the old stuff. Everything else got the new detergent, 1 scoop each load, and so far everything seems fine. My clothes feel soft, the whites are SUPER bright. Most of my colors seem okay, but since they are all pretty faded they didn't come out nearly as bright as my whites. I'm actually wearing some of the stuff washed in the new detergent and I don't notice much of a difference which I consider to be a success. I have super sensitive skin and I'm not having an itchy feelings or such.
Eventually I would like to try switching T's uniforms to the new stuff, but I'm going to give the DIY goods a few more shots before I make the change. The only thing that is a bit of a change is the lack of smell. Normally my clothes smell like whatever detergent or dryer sheets I'm using. After being out of the dryer for a couple hours, my clothes don't smell like anything. That's a bummer just cause I got so used to that Mountain Fresh type smell, but I'm sure I'll be happier with this.
On the other DIY front, I have A LOT going on and A LOT planned. To try to keep my expenses at bay, I'm going to do a list of what tasks I want to accomplish each month and my budget for them. If I am planning something big, obviously the other small ones will have to wait, but I'll report on that later. For now, it's off to bed to test out the linens.
Thursday, September 29, 2011
Going Green: Laundry Detergent
For anyone who is interested, here is where I got the recipe. I'm not going to pretend like I'm the creative cleaning goddess who came up with it, hell, I'm lucky I even figured out how to work the washer.
 By the time I got home last night, I was tired and really didn't want to tackle making my cleaning products, but I forced myself to at least make the laundry detergent. Since we are out I figured I better have it on stand by. Shockingly, it wasn't a total disaster. I will say next time I'm going to try a different soap instead of the fels-naptha. Only because by the time I was done grating it, I could barely stand the smell of it. That oh so pretty scent became stomach churning after breathing it in for a few minutes.
If you have ever wanted to make your own laundry detergent, but thought it would be too hard to, or too time consuming, I assure you it isn't. It's so easy I could do it. It's pretty much like a 5 step process:
1. Grate a bar of soap
2. Pour said soap into a jar
3. Add 1 cup Borax
4. Add 1 cup washing soada
5. Mix


If you have ever wanted to make your own laundry detergent, but thought it would be too hard to, or too time consuming, I assure you it isn't. It's so easy I could do it. It's pretty much like a 5 step process:
1. Grate a bar of soap
2. Pour said soap into a jar
3. Add 1 cup Borax
4. Add 1 cup washing soada
5. Mix


As far as scent goes, it really doesn't have much of one which is nice and from what I've read your clothes don't really end up having one. I haven't washed any clothes yet, so I'll have to report back on how they feel/smell once they are washed. Laundry detergent aside, I do think I might have a problem kicking my clorox wipe habit. Last night while I was brushing my teeth I grabbed one and was wiping down the counters and all I could think was "it's going to be such a pain in the ass to have to spray and then wipe." Hoping that changes with my super cleaning session this weekend!
Wednesday, September 28, 2011
Going Green: Price Check!
Let me preface this by saying had I done my research (which we all know I suck at) I probably could have saved a lot more money, but couponing and shopping smart is a whole other transformation that needs to occur.
So on my way home from work last night I stopped at the store to get my groceries and my aresnal of green cleaning products. It was actually kind of fun looking for them. It was like a grown up version of a treasure hunt because quite honestly, finding some of these items was a bit tricky as the stores have them hidden in the little crevices. Smart ones they are.
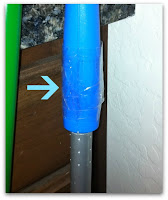 Due to my lovely OCD, I ended up purchasing things you probably don't have to, but there was NO way I was mixing uses. Like measuring cups, spoons, cheese grater, etc. Despite having all those items in my home, I opted to buy new ones specific to cleaning products. I also had to buy another mop since my Clorox Ready Mop ate it. Speaking of the Clorox Ready Mop, can I just express how much of a rip off that thing is?! the pads don't pick up nearly what they should. The cleaning solution barely spreads on the floor and smells a wee bit funky. The mop itself is SO flimsy and barely "mopping" my kitchen floor I ended up snapping the handle. I tried taping it back together, but that went over like a lead balloon. So yeah, totally done with that!
 I opted for the "Wonder Mop" since you can take the mop head off and wash it in the washing machine. Score! Not to mention with it not being the traditional square sponge, I can go back to wiping the baseboards down again with it. Yay! My back is already rejoincing over this decision. It's also VERY sturdy (I can neither confirm nor deny my testing it out in the grocery store.) I need something that I can put my elbow grease into and it's not going to snap and cause a plethora of vulgar words to spew from my mouth.
Anygerms, back to what I was saying. I ended up spending a total of $51.31 on my cleaning products. Again, this includes a couple itms you may not need to purchase. Taking out my mop and my not really needed, but bought due to my OCD items, I spent $26.51 on the actual cleaning supplies. Not bad! Unfortunately, there are some items you are going to pay a little more than necessary. Like extra light olive oil, $6.99 for a small cheap brand bottle! Oy vey. I also bought a big bottle of vinegar since it's being used in multiple capacities. Taking into account the recipes that I will be using, these supplies will last roughtly 2-6 months. Obviously the vinegar and baking soda will go faster, but the borax and olive oil should last closer to 6 months.

Trying to prove my savings, I also wrote down how much the original cleaning items I would buy were. I was appaled at what I actually spent on cleaning products & laundy detergent. I actually spent up to $60 a month on cleaning stuff! Just to have a clean home & clean clothes! I might as well of hired a cleaning lady! Switching to laundry detergent alone is massive savings! A box of our old detergent was about $16 on sale. The three products to make my detergent were only $11.56 and I bought enough of it that it should last a couple months. Our original detergent would last us a month (if we were lucky.) So I'm sold on this. Haven't even started and I'm sold.
Tonight's game plan is mixing up a couple of my cleaners and my laundry detergent. I'm actually excited to try them out! This weekend I'm going to try to get some essential oils to make things a little less vinegar smelling and have a full on cleaning session this Saturday night. It's sad how excited I am about this! I do know that for a while, while we are transitioning, I will continue to use some of the old products I had. I already spent the money, so I'm not going to waste them. I'll still use the Clorox wipes to wipe down the bathroom counter every night. I'll still use my toilet bowl cleaner and the like. Once they are gone, they are gone though. I'm determined to make this change!
So on my way home from work last night I stopped at the store to get my groceries and my aresnal of green cleaning products. It was actually kind of fun looking for them. It was like a grown up version of a treasure hunt because quite honestly, finding some of these items was a bit tricky as the stores have them hidden in the little crevices. Smart ones they are.
 Due to my lovely OCD, I ended up purchasing things you probably don't have to, but there was NO way I was mixing uses. Like measuring cups, spoons, cheese grater, etc. Despite having all those items in my home, I opted to buy new ones specific to cleaning products. I also had to buy another mop since my Clorox Ready Mop ate it. Speaking of the Clorox Ready Mop, can I just express how much of a rip off that thing is?! the pads don't pick up nearly what they should. The cleaning solution barely spreads on the floor and smells a wee bit funky. The mop itself is SO flimsy and barely "mopping" my kitchen floor I ended up snapping the handle. I tried taping it back together, but that went over like a lead balloon. So yeah, totally done with that!
Anygerms, back to what I was saying. I ended up spending a total of $51.31 on my cleaning products. Again, this includes a couple itms you may not need to purchase. Taking out my mop and my not really needed, but bought due to my OCD items, I spent $26.51 on the actual cleaning supplies. Not bad! Unfortunately, there are some items you are going to pay a little more than necessary. Like extra light olive oil, $6.99 for a small cheap brand bottle! Oy vey. I also bought a big bottle of vinegar since it's being used in multiple capacities. Taking into account the recipes that I will be using, these supplies will last roughtly 2-6 months. Obviously the vinegar and baking soda will go faster, but the borax and olive oil should last closer to 6 months.

Trying to prove my savings, I also wrote down how much the original cleaning items I would buy were. I was appaled at what I actually spent on cleaning products & laundy detergent. I actually spent up to $60 a month on cleaning stuff! Just to have a clean home & clean clothes! I might as well of hired a cleaning lady! Switching to laundry detergent alone is massive savings! A box of our old detergent was about $16 on sale. The three products to make my detergent were only $11.56 and I bought enough of it that it should last a couple months. Our original detergent would last us a month (if we were lucky.) So I'm sold on this. Haven't even started and I'm sold.
Tonight's game plan is mixing up a couple of my cleaners and my laundry detergent. I'm actually excited to try them out! This weekend I'm going to try to get some essential oils to make things a little less vinegar smelling and have a full on cleaning session this Saturday night. It's sad how excited I am about this! I do know that for a while, while we are transitioning, I will continue to use some of the old products I had. I already spent the money, so I'm not going to waste them. I'll still use the Clorox wipes to wipe down the bathroom counter every night. I'll still use my toilet bowl cleaner and the like. Once they are gone, they are gone though. I'm determined to make this change!
Tuesday, September 27, 2011
Going Green: I’m Gonna Make A Change…
There is a huge “Green” movement going on right now. Suddenly everyone is all concerned about Mother Earth and how our waste and treatment of this planet is destroying it. Duh. I think humanity is about a day late and a dollar short, but I respect what people are trying to do. Companies have jumped in on that too! You have organic fruits & veggies in the produce section of your store. You have cleaning products that are “greener” and pretty much just about anything else you could imagine.
Personally, I’m not much of a follower as far as trends and fads go and tend to be on the front of them (like my cutting my denim skirt shorter and all the girls at school telling me the fraying was hideous and one year later buying skirts with said fraying.) So my jumping in on this “Green” thing really has nothing to do with our lovely planet (sorry Mother Earth!) It is 100% due to my OCD.
I have OCD (diagnosed too!) and my big thing is germs. I loathe them with a passion. I am constantly using hand sanitizer or wiping things down. I refuse to share my chapstick and when my own husband asks for a drink of my water I cringe. I have been this way for as long as I can remember. It’s actually been a long standing joke in my family. The thing is, OCD really isn’t funny and neither are the consequences of having it. Often times, my hands are cracking and bleeding due to excessive washing. I have gotten out of bed in the middle of the night because I felt dirty and needed to clean up leaving me exhausted and sleep deprived. If I just washed my hands, I won’t pet our animals for fear of germs. The older I get, the worse my OCD gets.
My irrational fear of germs has lead me to wiping things down constantly. In doing this, I am exposing not only myself, but my entire household to the harsh chemicals inside cleaning products on a regular basis! I’m not sure if you have ever read the back of your Windex bottle or your toilet bowl cleaner, but there is some scary stuff in there. I had no idea! I never thought the very products I am using to protect me from getting sick are the same products that are making me feel as bad as I do. The sore throats, the runny nose, the headaches, the burning sensation on my skin, the list goes on. I didn’t once think it could be the cleaning products, until I did my research.
I’ll be honest; I’m not much a researcher and I pretty much always bought cleaning products based on their commercials. If I liked the commercial, chances are I would like the product. So I really had no idea what I was bringing into my home. When I started finding other people out there who were having the same issues as me, it scared the crap out of me. If it was making ME feel this bad, what could it do to my animals? Or worse, our future children! I decided we had to make a change. My OCD is never going to go away, so I needed to find a safer way to work around it, insert greener cleaners.
I’m not just talking Eco-Friendly Mr. Clean; I’m talking vinegar and water. There are so many natural products that do the exact same thing as the name brand cleaners, just without the dye or the harsh chemicals. As a society we have been brainwashed into thinking we had to get these lemon and pine scented products or our home was dirty. I have found that simply isn’t true. There are TONS of recipes out there to make the same cleaning products you use, with materials you more than likely already having in your home! So I’m hooked.
I went over things with T last night and he looked at me like I had 6 heads. I’ll admit, the whole going “green” thing does seem a bit out of no where, but aren’t most great ideas? I’m going to start simple. I am going to make my own general cleaner (for counters & floors), a glass cleaner (we have tons of mirrors) and our own laundry detergent. As luck would have it, we’re out so figured now is a great time to make that switch as well. Eventually I would like to make my own dishwasher detergent, but I still have 3 boxes of it and since it doesn’t come into contact with my skin, I figured it would be safe to use for a while longer. There are a couple other things I would like to change too (like our air fresheners!), but I’m baby stepping this. I need to be realistic.
Another huge perk to doing this, we’re going to save a butt ton of money. Since I am an anti-germ freak, we buy cleaning products on the regular. At any given time I have at LEAST 2 bottles of window cleaner, 3 bottles of toilet bowl cleaner, 1 bottle of soft scrub, 1 can oven cleaner, 3 packs of Clorox (or cheaper brand) wipes, 2 cans of endust, 1 container of pine sol and a few others that aren’t coming to mind this second. Crazy huh? At $2-5 per bottle/can for these items, I would say we easily spend upwards of $50 a month just in cleaning products. So it’ll be nice to have some extra $$ back in our pocket. Initially it’ll be a bit pricy to buy the new containers and rags, mop, bucket (yep, going back to the OG mop) and everything else, but in the long run it’ll be a huge money saver for us.
I’ll keep you updated to how the adjustment is going and what financial/physical effect it is having. I’m hoping that in a month we’ll really start seeing all the positive results from this switch and be able to make more.
Personally, I’m not much of a follower as far as trends and fads go and tend to be on the front of them (like my cutting my denim skirt shorter and all the girls at school telling me the fraying was hideous and one year later buying skirts with said fraying.) So my jumping in on this “Green” thing really has nothing to do with our lovely planet (sorry Mother Earth!) It is 100% due to my OCD.
I have OCD (diagnosed too!) and my big thing is germs. I loathe them with a passion. I am constantly using hand sanitizer or wiping things down. I refuse to share my chapstick and when my own husband asks for a drink of my water I cringe. I have been this way for as long as I can remember. It’s actually been a long standing joke in my family. The thing is, OCD really isn’t funny and neither are the consequences of having it. Often times, my hands are cracking and bleeding due to excessive washing. I have gotten out of bed in the middle of the night because I felt dirty and needed to clean up leaving me exhausted and sleep deprived. If I just washed my hands, I won’t pet our animals for fear of germs. The older I get, the worse my OCD gets.
My irrational fear of germs has lead me to wiping things down constantly. In doing this, I am exposing not only myself, but my entire household to the harsh chemicals inside cleaning products on a regular basis! I’m not sure if you have ever read the back of your Windex bottle or your toilet bowl cleaner, but there is some scary stuff in there. I had no idea! I never thought the very products I am using to protect me from getting sick are the same products that are making me feel as bad as I do. The sore throats, the runny nose, the headaches, the burning sensation on my skin, the list goes on. I didn’t once think it could be the cleaning products, until I did my research.
I’ll be honest; I’m not much a researcher and I pretty much always bought cleaning products based on their commercials. If I liked the commercial, chances are I would like the product. So I really had no idea what I was bringing into my home. When I started finding other people out there who were having the same issues as me, it scared the crap out of me. If it was making ME feel this bad, what could it do to my animals? Or worse, our future children! I decided we had to make a change. My OCD is never going to go away, so I needed to find a safer way to work around it, insert greener cleaners.
I’m not just talking Eco-Friendly Mr. Clean; I’m talking vinegar and water. There are so many natural products that do the exact same thing as the name brand cleaners, just without the dye or the harsh chemicals. As a society we have been brainwashed into thinking we had to get these lemon and pine scented products or our home was dirty. I have found that simply isn’t true. There are TONS of recipes out there to make the same cleaning products you use, with materials you more than likely already having in your home! So I’m hooked.
I went over things with T last night and he looked at me like I had 6 heads. I’ll admit, the whole going “green” thing does seem a bit out of no where, but aren’t most great ideas? I’m going to start simple. I am going to make my own general cleaner (for counters & floors), a glass cleaner (we have tons of mirrors) and our own laundry detergent. As luck would have it, we’re out so figured now is a great time to make that switch as well. Eventually I would like to make my own dishwasher detergent, but I still have 3 boxes of it and since it doesn’t come into contact with my skin, I figured it would be safe to use for a while longer. There are a couple other things I would like to change too (like our air fresheners!), but I’m baby stepping this. I need to be realistic.
Another huge perk to doing this, we’re going to save a butt ton of money. Since I am an anti-germ freak, we buy cleaning products on the regular. At any given time I have at LEAST 2 bottles of window cleaner, 3 bottles of toilet bowl cleaner, 1 bottle of soft scrub, 1 can oven cleaner, 3 packs of Clorox (or cheaper brand) wipes, 2 cans of endust, 1 container of pine sol and a few others that aren’t coming to mind this second. Crazy huh? At $2-5 per bottle/can for these items, I would say we easily spend upwards of $50 a month just in cleaning products. So it’ll be nice to have some extra $$ back in our pocket. Initially it’ll be a bit pricy to buy the new containers and rags, mop, bucket (yep, going back to the OG mop) and everything else, but in the long run it’ll be a huge money saver for us.
I’ll keep you updated to how the adjustment is going and what financial/physical effect it is having. I’m hoping that in a month we’ll really start seeing all the positive results from this switch and be able to make more.
Monday, September 26, 2011
DIY Capiz Chandelier: Mmm, These Words Taste Good
I'm not going to lie, this project SUCKS! When I originally found this I thought for sure I could pull it off. It looked uber easy, so I foolishly thought "how hard could it be?" Okay, it's not hard, but omg it is so time consuming!!! When I'm done with it, it had better rock my world!
Anyshells, after a few weekends off due to AC issues and personal reasons, I finally got back to work on it on Sunday at about 7 am. I actually kicked out quite a few of the longer strands, which just so happen to be the ones who make me want to run head first into a wall! Currently, my chandi has 4 "rows" of shells at 5, 7, 9, & 11 long. The 11 long ones make me hostile to work on just because they become difficult to manage. Another pain to deal with is trying to attach them only because my frame isn't hanging on anything to keep the strands straight, I'm trying to work with it resting on the counter which is practically impossible. I'm thinking I need to Polish rig this bad boy this weekend so it's not so hard to attach them.


Anyshells, after a few weekends off due to AC issues and personal reasons, I finally got back to work on it on Sunday at about 7 am. I actually kicked out quite a few of the longer strands, which just so happen to be the ones who make me want to run head first into a wall! Currently, my chandi has 4 "rows" of shells at 5, 7, 9, & 11 long. The 11 long ones make me hostile to work on just because they become difficult to manage. Another pain to deal with is trying to attach them only because my frame isn't hanging on anything to keep the strands straight, I'm trying to work with it resting on the counter which is practically impossible. I'm thinking I need to Polish rig this bad boy this weekend so it's not so hard to attach them.
To keep you up to date here are a couple pictures of the current status of my chandi and the workstation in which I am trying to work with. No criticisms please, I'm working on multiple projects at once so work space is a bit tight!


Speaking of other projects...I went to Ikea on Saturday with my parents and bought a couple items for the casa which I'm stoked about! One of them was a mirror that I have been lusting after since I saw it. Not exactly a fan of the color, but I'm working on that! I'm not going wild and crazy, just making it a little more....us. Stay tuned!

Friday, September 9, 2011
I'm Back!
It's been a pretty hectic week around this house and this is actually the first time I've had my computer on in over a week!!!
Lets start with the beginning, last Saturday we painted! My dad came over and helped T and I paint a few walls downstairs. It was a lot of fun, we learned a lot and I am in love with the color! I'll have to take some pics to post. The day was going so well and we were in such a great mood and then tragedy struck. Around 9 pm we noticed our AC started making some weird noises and almost as quickly as they started, they stopped...as did our AC. Yep, in the great state of AZ our AC died! It was hell, literally.
Of course since we have all the luck, the guy couldn't fix it until AFTER the holiday weekend. When Tuesday came, we still couldn't get it fixed. I was borderline psychotic at this point. The temp in the house was out of control. I'm not talking a warm temp, I'm talking take your breath away.


Lets start with the beginning, last Saturday we painted! My dad came over and helped T and I paint a few walls downstairs. It was a lot of fun, we learned a lot and I am in love with the color! I'll have to take some pics to post. The day was going so well and we were in such a great mood and then tragedy struck. Around 9 pm we noticed our AC started making some weird noises and almost as quickly as they started, they stopped...as did our AC. Yep, in the great state of AZ our AC died! It was hell, literally.
Of course since we have all the luck, the guy couldn't fix it until AFTER the holiday weekend. When Tuesday came, we still couldn't get it fixed. I was borderline psychotic at this point. The temp in the house was out of control. I'm not talking a warm temp, I'm talking take your breath away.


Even in the morning it was terrible. Thankfully we were able to get 2 portable air conditioners, 1 from my in-laws, 1 from my parents. Without those we would have died. We were so excited when they finally fixed our AC on Wednesday. It's been lovely ever since!
Of course, during the god awful heat issue in the house my body decides to O. Awesome. Using the OPK's wasn't too bad, despite my bathroom feeling like a sauna, my body temps though were all over the map.


I'll be curious to see what FF does with my crosshairs since my temps do not correspond with my OPK's. Time will tell. Speaking of the baby front, I had my blood drawn today to check my progesterone. I'm anxious to see what the results are as it will impact when we do decide to start trying again. I'm thinking that our go date will be soon! [insert excited squeal here]
Monday, August 29, 2011
DIY Capiz Chandelier: The Little Light That Could
Being a first time home buyer, I made the HUGE mistake of impulse buying. Instead of taking my time to decide on what I really want, I just went with what I thought was cool...at that moment. Hence, the lighting downstairs that I've grown to loathe. There is nothing wrong with the lights per say, they are just not at all near what I want. For months now I have obsessed about getting a new light for the dining room. Since I have an open floor plan you can see the dining room from the kitchen and living room which means I see that light ALL THE TIME!
A few months ago I told T I wanted new lights. Since he originally told me to take my time to decide and I still impulse bought, he wasn't exactly thrilled at the idea of getting new lights. I kept putting the new dining room light on the back burner month after month. I tried to see his side. They worked and there wasn't anything wrong with them. Eventually I couldn't take it anymore so basically said we're getting a new light, period. After searching and searching and doing my best to combine our styles, I found this one from West Elm.

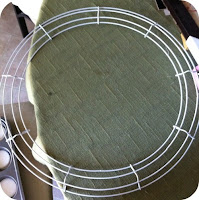

A few months ago I told T I wanted new lights. Since he originally told me to take my time to decide and I still impulse bought, he wasn't exactly thrilled at the idea of getting new lights. I kept putting the new dining room light on the back burner month after month. I tried to see his side. They worked and there wasn't anything wrong with them. Eventually I couldn't take it anymore so basically said we're getting a new light, period. After searching and searching and doing my best to combine our styles, I found this one from West Elm.

I loved the light and T actually didn't hate it! SCORE! Well, until he saw the price, a hefty $269. Yeah, didn't like the light anymore. I can't say that I blame him, $269 for a light seems a bit steep. Yes, it is gorgeous and I would have loved to have it in my home, but not for $269 bells. I was just about defeated when I turned to my best friend, Pinterest and found this tutorial. It didn't look too hard so I figured I would tackle it and not to mention if it worked, I would save over $200!! So I got my supplies!
Circle cutter, check. A wreath frame spray painted white, check. Wax paper faux shells, check. I'll be honest with you, ironing the wax paper and actually cutting out the shells was a serious pain in my ass! My OCD side wanted to iron out every little air bubble, but you can't. The air bubbles and imperfections are what makes each "shell" unique like real ones. Cutting the shells was definitely a trial and error process. The tutorial I found said 2 inches, but that just seemed way too big for my taste so I tried a bunch of different sizes. 1.5 inches ended up being my winner.
Making the strand of shells was also a bit of trial and error process. I messed around with spacing and overlapping and butting them one against another before I decided on a slight overlap. It's definitely a personal preference. Since you can somewhat see the hot glue through the "shells," I wanted the overlap to help hide that. It does work. Attaching the strand of shells to the metal frame about made me throw the towel in on this project. I wanted to hot glue them to the metal, but hot glue doesn't exactly cling to metal very well. I got about three strands in before the first one fell off. I quickly realized I needed a more sturdy option so I opted to leave my fishing wire long at the top so I can tie them to the frame. That works MUCH better.
I would love to say that I'm done with this project, but I'm not. In fact, I'm no where near close to done, yet I'm determined to finish this. It's taking me longer just because of the size of my light. I'm sure if I went smaller it would go a lot faster and if I wasn't so OCD about it, but I would rather do it right the first time. I'm not sure if I love it quite yet, but it's definitely starting to take shape. Stay tuned!

Subscribe to:
Posts (Atom)