A few months ago I told T I wanted new lights. Since he originally told me to take my time to decide and I still impulse bought, he wasn't exactly thrilled at the idea of getting new lights. I kept putting the new dining room light on the back burner month after month. I tried to see his side. They worked and there wasn't anything wrong with them. Eventually I couldn't take it anymore so basically said we're getting a new light, period. After searching and searching and doing my best to combine our styles, I found this one from West Elm.

I loved the light and T actually didn't hate it! SCORE! Well, until he saw the price, a hefty $269. Yeah, didn't like the light anymore. I can't say that I blame him, $269 for a light seems a bit steep. Yes, it is gorgeous and I would have loved to have it in my home, but not for $269 bells. I was just about defeated when I turned to my best friend, Pinterest and found this tutorial. It didn't look too hard so I figured I would tackle it and not to mention if it worked, I would save over $200!! So I got my supplies!
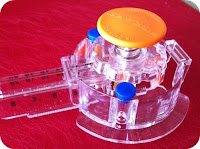
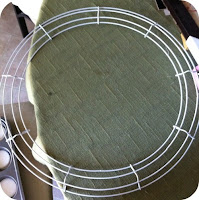
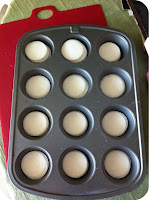
Circle cutter, check. A wreath frame spray painted white, check. Wax paper faux shells, check. I'll be honest with you, ironing the wax paper and actually cutting out the shells was a serious pain in my ass! My OCD side wanted to iron out every little air bubble, but you can't. The air bubbles and imperfections are what makes each "shell" unique like real ones. Cutting the shells was definitely a trial and error process. The tutorial I found said 2 inches, but that just seemed way too big for my taste so I tried a bunch of different sizes. 1.5 inches ended up being my winner.
Making the strand of shells was also a bit of trial and error process. I messed around with spacing and overlapping and butting them one against another before I decided on a slight overlap. It's definitely a personal preference. Since you can somewhat see the hot glue through the "shells," I wanted the overlap to help hide that. It does work. Attaching the strand of shells to the metal frame about made me throw the towel in on this project. I wanted to hot glue them to the metal, but hot glue doesn't exactly cling to metal very well. I got about three strands in before the first one fell off. I quickly realized I needed a more sturdy option so I opted to leave my fishing wire long at the top so I can tie them to the frame. That works MUCH better.
I would love to say that I'm done with this project, but I'm not. In fact, I'm no where near close to done, yet I'm determined to finish this. It's taking me longer just because of the size of my light. I'm sure if I went smaller it would go a lot faster and if I wasn't so OCD about it, but I would rather do it right the first time. I'm not sure if I love it quite yet, but it's definitely starting to take shape. Stay tuned!

No comments:
Post a Comment