

Figured those first few steps would be a lot easier to just put into some simple collages. Yes, I'm one of those freaks who likes to take pictures of every step. I guess it's because I'm a visual learner. Anywho, after I got table 1 put together, it was time to see how tall my table would be once I added the "base" which is really just the table top from the 2nd table.
 And cue "awe son of a..." it was too short, by like three inches. Yes, I'm sure I could have avoided this frustration had I actually measured everything before I went to Ikea, but that would make sense and I'm not all about that. I'm all about just buying something and then trying to find a way to Polish rig the SOB into working. So I sat down on my couch and pondered "how can I get this to be taller without taking away from the boxy look?
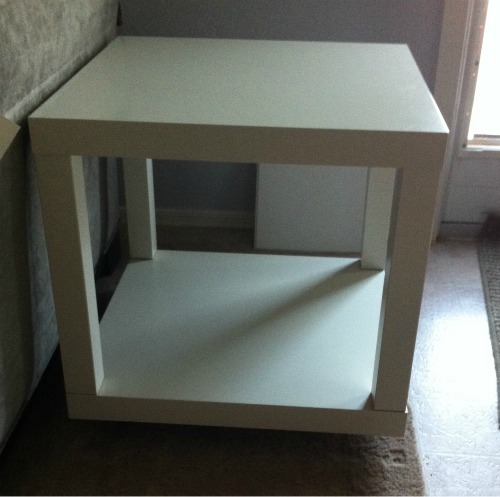 :Ding: I figured it out. I was super excited when I figured out the way to give my table a little bit of a lift without taking away from the cube look. I was very excited to say the least. (I can neither confirm nor deny I was doing the "Carlton" when I figured out how to fix my raising issue.)
  Next on our agenda was to put the tables together more securely (read: fight with T over gluing the legs onto the "bases" and trying to get everything to line up when you are dealing with a cheaper brand table where nothing is lining up correctly.) There was four letter words flying, I might have told T I wanted to punch him in the face followed by him laughing hysterically at me as I vigorously washed my hands to get the glue off only for him to remind me the glue was water activated. Thanks hun, that information would have been more useful to me PRIOR to washing my hands!
  We let the glue set for the required amount of time and once my timer "dinged" I set out to set the tables in their respective areas. I will admit, I was ridiculously excited as T was moving the old tables and replacing with the new tables. Adding the white tables completely changed the look of the room making it more "mod" than it was before. We both love the straight, simple lines and the brightness of the white as opposed to the dark wood we had before. However, once we put the tables into place and added our new Ikea lights, a little vintage art and vase I realized how much I LOATHE my wood blinds and want to light them on fire. I think the next DIY task will be replacing them!
 So the big question is how did we raise them up without affecting the box look? It's so simple....
 Yep, we just glued 2 of the extra legs to the bottom of the "base." We made sure to put them close enough to the center to keep them from being seen, giving the table almost a floating effect, but also close enough to the outside to keep the table stable.
I was actually really surprised that I hadn't seen this done yet. I've seen people basically stack the tables on top of one another and just cut the bottom tables legs to 2-3 inches, but to me that completely takes away from the box look we were going for.
Now that the tables are in their spots and I've had a couple hours to stare at them I can honestly say I LOVE them! They are exactly what we wanted and the total cost completely rocked our world without breaking our budget. This project has definitely thrown some fuel on our DIY fire.
Total Cost: $32.00 for 2 side tables!
No comments:
Post a Comment